

The numbers are hard to ignore; Canadians are active on social media. 94% of adult internet users have at least one social media account. The most popular platform is Facebook. The social media giant says there are 23 million monthly active Facebook users in Canada. As a financial planner, that is a lot of potential clients to tap into.
Facebook is the perfect place for you or your firm to build a community and encourage engagement with your brand. You can treat your Facebook page like a mini version of your website, sharing news, photos, articles from your company, as well as other relevant industry related news. If you are new to social media, no problem. We are going to give you a step-by-step guide that will teach you how to do the following:
- Starting A Personal & Business Page (It’s easier than you think)
- Building Your Business Page
- Inviting Your Friends, Family, and Supporters
- Posting On Your Page
- Get Social: How To Like, Share, & Comment
Before we begin, remember: YOU CAN DO THIS!
Getting Started On Facebook
To create a Facebook Page, you’ll need to already have a personal profile. This is because only people with profiles on Facebook can create or have a role on business pages.
To create a personal Facebook account:
1. Go to www.facebook.com
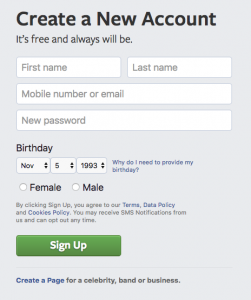
2. Enter your name, email or mobile phone number, password, date of birth and gen
3. Click “Sign Up”.
4. To finish creating your account, you need to confirm your email or mobile phone number. It’s that easy. Now you’re ready to set up a business page.
Setting Up a Business Page
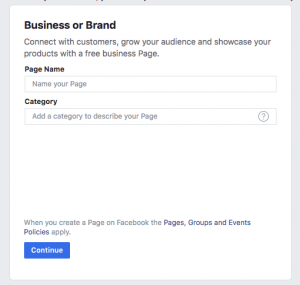
To set up an account for your business, visit https://www.facebook.com/pages/creation/ and follow the steps to start a Business or Brand page by clicking “Get Started”.

Then enter your business name and business category, then click continue.
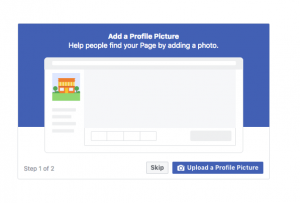
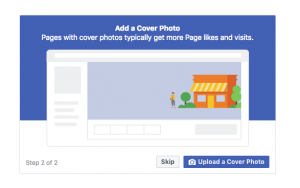
Next, upload a profile picture and cover photo.
Adding Your Business Details
Now that you have completed the first steps of setting up your business page, it’s time to add more details about the financial planning services you provide.
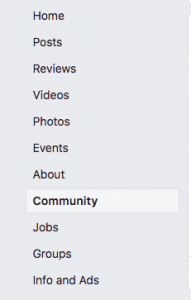
To add additional information, click About (on the left-hand side, below your profile picture), then click Edit Page Info.
Now add the following to your Page:
Description: Add a short description to your business. Keep it short and sweet (1–2 sentences).
Contact Info: Add a phone number, website, and email address. This will make it easy for the people who visit your page to access this information and get in touch with you.
Location Hours: Add your address and business hours so that people know when and where to visit you.
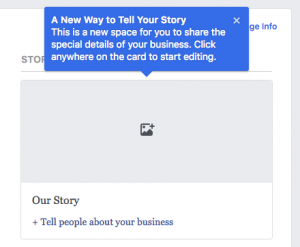
Story: A new feature on Facebook is adding a Story to your page. This is where you can share additional information about your financial planning business. Stories can include things like when your business was founded, what you specialize in, your mission and much more.
Invite Your Friends To Like The Page
Inviting personal friends to like your Facebook page is a great way to start building your audience. You should send “Friend Requests” to friends, family, and other people on Facebook whom you know and trust.
To invite friends to like your Page:
1. Go to your page and click Community in the left column.
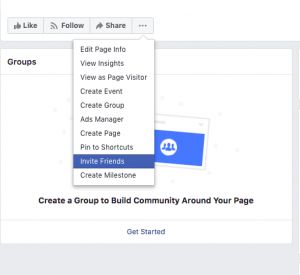
2. In the right column, click Invite Friends.
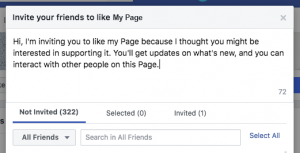
3. Enter a friend’s name in the search box and then click Invite next to their name. If you want to invite your entire friend list, you can click Select All. Facebook generates an automatic request (see below), but you can customize the invitation to make it more reflective of your brand and more personalized to your friend group.
Create Engaging Page Posts
Now that you are on Facebook, you need to be active on Facebook. It’s time to Post to your Page. It is important that the content you provide is relevant to your audience; post information that teaches people new things, entertains them, makes them think, offers them something they’re interested in, or adds value to their lives in some way. As an R.F.P. you have a wealth of knowledge to share.
Here’s how you post:
Creating a Post
1. From the top of your News Feed or timeline, click Create Post.
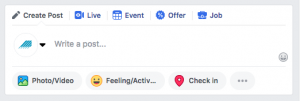
2. Add text where it says Write a post… Be sure to:
- Add a photo, graphic, or video if you can
![]()
- If you would like to tag another business page, start by typing @ and then start typing the name
- Add a location
![]()
3. Choose where you’d like to share your post. If you add a photo, video, or text with a background as your post, you’ll also have the option to share to your story. Click to select News Feed, Your Story, or both. Here is the difference between the two options:
News Feed: Your post will show up in News Feed and on your timeline.
Your Story: Your story will be visible to your selected audience for 24 hours.
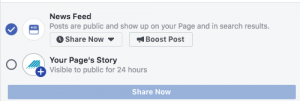
4. A check mark will indicate which option you have picked.
5. Click Share Now.
6. Pat yourself on the back because you have made your first post!
Get Social: Like, Share, & Comment
It is important that you engage with a variety of content from other people and businesses on Facebook to make you more visible. Liking, commenting, and sharing content is how you can engage with others on Facebook.
Here are some other helpful tips for posts:
Your Tone: Being on social media means you are sharing the voice of your brand in a fast-paced, very public space. Developing your company’s tone and messaging is crucial to ensure that you are confident and consistent on social. How do you want your company to sound in public? Witty? Trendy? Professional? Friendly? Most likely, you’ll want a combination of one or more traits to come through in your brand’s tone.
A Schedule for Posting: People will not trust your Facebook page if it seems inactive. It’s crucial to develop a schedule for posting and providing updates to your Page. We recommend posting at least 2 times each week to keep your audience engaged.

You can see in this recent IAFP post that the like, comment and share options are at the bottom of a post. Here is what each action is for:
★ Like: Clicking “Like” below a post on Facebook is a way to let people know that you enjoyed it without leaving a comment. Just like a comment, anyone who can see the post can see that you liked it. Facebook gives you these reaction options for liking:

★ Comment: You can share your thoughts by adding a comment. It’s a way to join an existing conversation or to start a new one. For example, you may read a financial article that someone posted and want to respond with your unique viewpoint.
★ Share: When you share something, it means anyone can see it on your Business Page. Make sure the content you share is relevant and professional so that the people who follow or like your Page find it meaningful. When you share a post, you are giving it a stamp of approval; only share something that you would want your client or colleagues to see.
Facebook is a great way to market your business. It may seem complicated, but by following these steps, you have all the basics covered. Over time, you will find that Facebook is one of the best tools for targeting a specific audience. Happy Facebooking!


